Tuesday, October 18, 2011

I love to craft!!

Hi my friends! I love to make gifts to give away! (When I find the time!)  One of my friends just had a beautiful baby boy and I knew that I wanted to make something for him!
I really like making shirts and cutting fabric with the cricut.
Here is a list of the supplies I used:
1 blue onsie (bought it at Hobby Lobby), white fabric, green fabric, brown fabric, tan fabric, wonder under, hot iron, deep cutting blade, and my Create a critter cartridge.
For the card: white cardstock, green cardstock, brown cardstock, tan cardstock, blue cardstock & pop dots.
I layered blue cardstock on my white card I made from the white cardstock.
I made the monkey for the card first because I wanted to make sure all the colors worked well together. I cut the monkey at 3 1/2" from Create a critter on page 46. I also cut the vine from that page. Layered the monkey and added pop dots on the back. Stuck the vine down first then added the monkey.
I then ironed 6 x 6 squares of each color of fabric to my wonder under then placed each one on my sticky 12 x 12 cricut mat.  For this project I had to use the deep cutting blade because some of my fabric was pretty thin and the regular blade tore the fabric. Using the same method I have used before: pressure high, speed low I cut each layer.  I cut the monkey and vine at 3 1/2" also.  I then ironed on the vine first, then the dark brown layer, the white layer and last the tan layer.  I think it turned out pretty cute!  Thanks for visiting!  Christina

Saturday, October 15, 2011

My Cricut Craftroom's Fall Favorites Blog Hop Day 2!!


Welcome to My Cricut Craft Room's Fall Favoites Blog Hop! This is a two day hop! Today is day 2!!
You should have started at http://mycricutcraftroom.blogspot.com/ if not please start at the beginning.

Thank you for coming back to see the rest of my project! If you are just joining the Hop make sure you start with Day 1 to see all the great projects!  Thank you for all the wonderful comments and new followers welcome! 
I really love making scrapbook pages, although I never know what pictures I am going to use and sometimes I have to squeeze in more pictures because I tend to take a lot!
Here is the list of supplies I used to make the scrapbook pages:  Martha Stewarts Drippy Goo punch, American Crafts Creepy phrases stickers (the saying), black cardstock, Imaginisce Hallowhimsy glimmer paper pad (the striped paper), adhesive and glue pop dots & my mummy, and witch cuts from yesterday.


First I cut some paper to mat my photo's on and cut the bottom with the Martha Stewart punch. Then I added my saying to one of the mats, and placed everything on my 12 X 12 striped paper.  I really love the colors in this paper!! Here is a picture of both pages together:

Here are the pictures of each individual page:
Here is the second page:
I hope you liked my pages!  Now on to your next stop:


In case you loose your way here is the complete hop list, Happy Hopping!!


Erica http://mycricutcraftroom.blogspot.com/
Yvette http://gammascreativecorner.blogspot.com/
Samantha http://samanthascricutcreations.blogspot.com/
Shelly http://kccroppers.blogspot.com/

Gayle http://gscraptime.blogspot.com
Erica’s project http://ericascraftroom.blogspot.com/2011/10/my-creation-for-this-weekend.html
Connie http://conniescraftycloset.blogspot.com/
Lori http://www.scrappinmystressaway.blogspot.com/
Christina Capps http://www.cema1cema.blogspot.com/ you are here
Amy
http://scrapthissavethat.blogspot.com/ next
Erica’s Blog Candy http://ericasblogcandy.blogspot.com/

Friday, October 14, 2011

My Cricut Craftroom's Fall Favorites Blog Hop!!


Welcome to My Cricut Craft Room's Fall Favoites Blog Hop! This is a two day hop!
You should have started at http://mycricutcraftroom.blogspot.com/ if not please start at the beginning.

I love fall! Halloween is one of my favorite times!  Today I am going to show you a couple of projects using the Cricut Cartridge Happy Hauntings. It is one of my favorite cartridges!!  I will show you a couple of the cuts and how I put them together.  Here is my first cut:   

This is the mummy from page 32.  I cut him out @ 4 1/2" of black paper first then I cut him out of green paper at 4 1/2" also cutting out the extra arm.  I added a foam pop dot to the extra arm. Next I chalked him around the edges with some black Stampin Up! chalk and added red stickles to his eyes. Here is the picture of  Mr. Mummy finished:

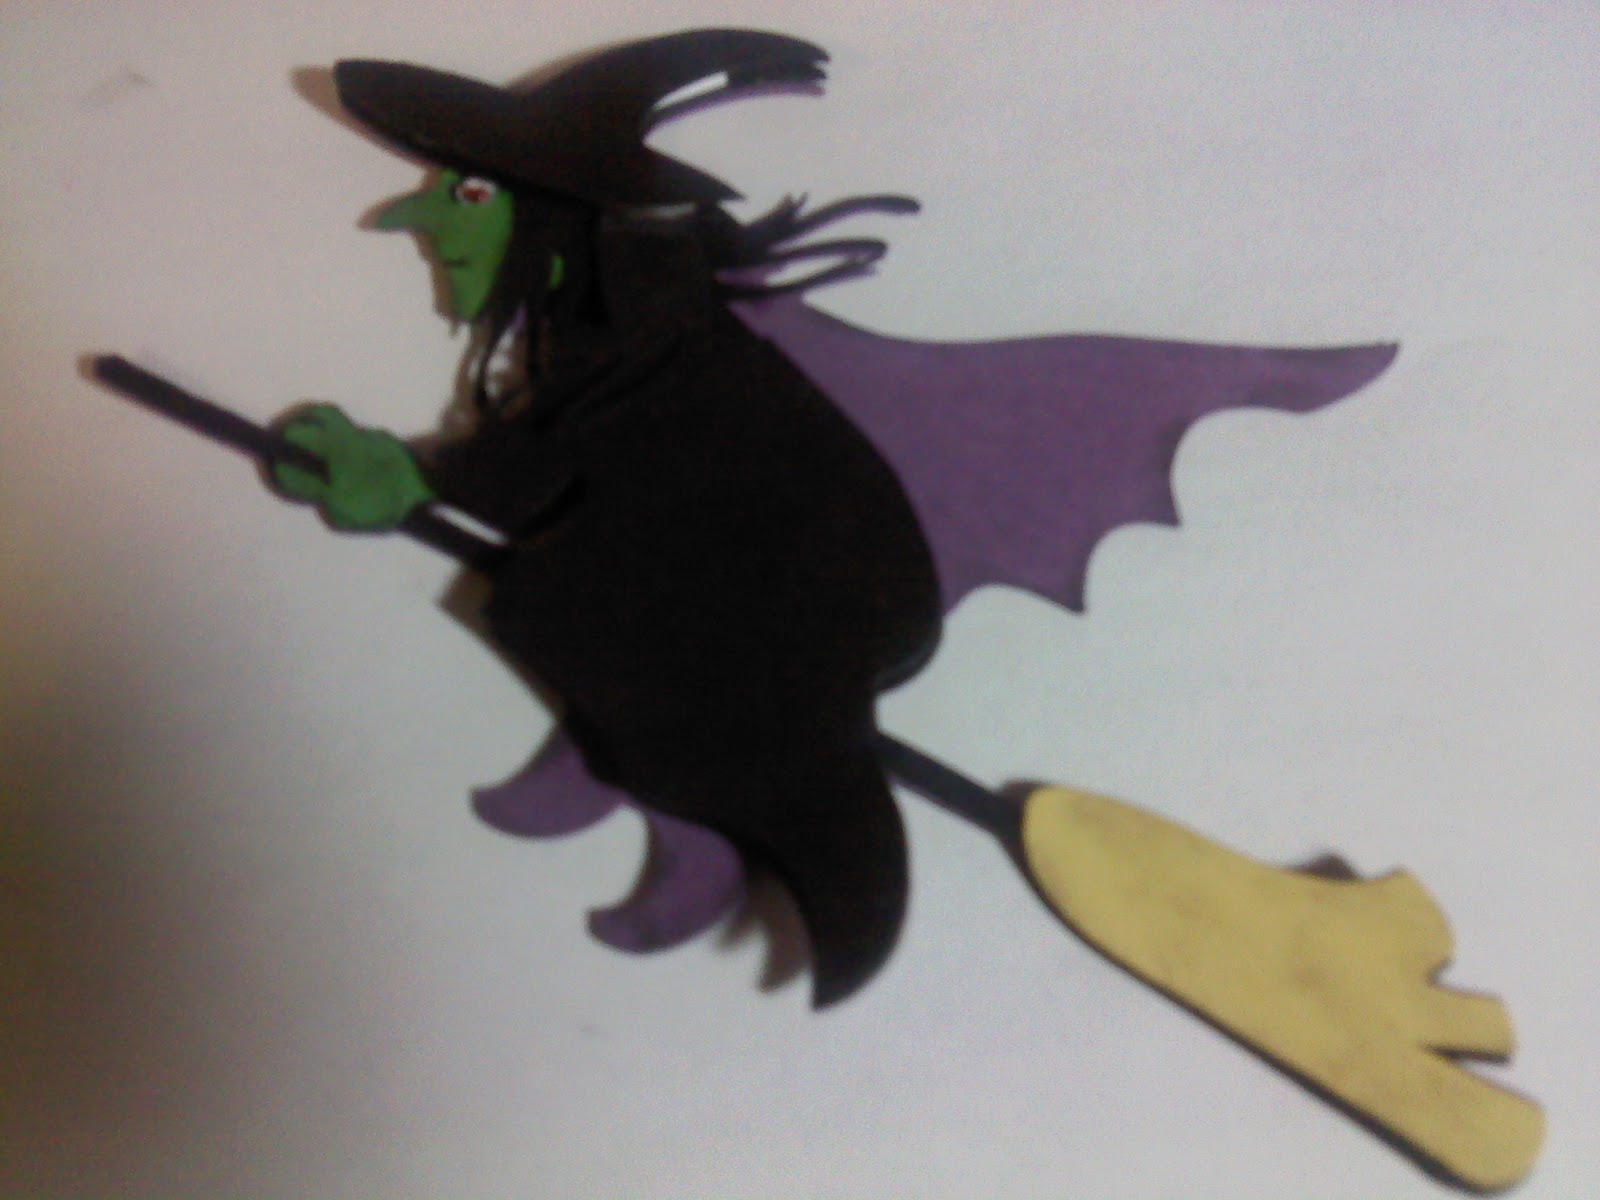
For my next cut I used the Witch on page 34 of  Happy Hauntings.
I cut her out at 4 3/4" from purple and black.  I actually cut the black 3 times to use her hair in different places.  I cut her face out of green cardstock, and the bottom of the broom in yellow.  I layered 1 black witch on top of the purple one, then cut the body, hair, and hat from another witch.  Added a pop dot to the body and the hat and glued on both cuts of hair to her.  I then used black chalk around her edges.  I used a white gel pen on her eye and red stickles too.  I'm really loving stickles!   Here is the finished witch:  
Please check back tomorrow and I will have both of my projects made into a 2 page layout.  Thanks for stopping by!!  Now on to your next stop! 

  In case you loose your way here is the complete hop list, Happy Hopping!!


Saturday, October 8, 2011

What I love about Halloween/Fall Blog Hop Day 2


Welcome to the What I Love About Fall/Halloween Blog Hop. This hop is scheduled from Oct. 7 at 8:00 am through Oct.8 at 11:00 pm(central time).

If you just happened to come to this blog, you can start at the beginning with Lisa Peters http://handmadewithlove-lisa.blogspot.com . If you just came from Sherry's  blog:  http://www.upordowntheyrebeautiful.blogspot.com/ , then you are in the right spot!

We're so e...xcited to be doing this hop and we have a fabulous lineup with some very talented ladies. There will be lots of fun projects, along with some great blog candy, and a great grand prize for this hop.

The hop is a 2 day hop so you will have plenty of time to make it through the whole hop lineup twice. Check out each blog and see what blog candy you can win at the individual stops. Please come back both days to see great projects.

Here is the complete lineup:


Lisa- http://handmadewithlove-lisa.blogspot.com/
Lisa Pontious ~ http://honeybearzdesigns2011.blogspot.com/
Kristy ~ http://scraptasticalkreations.blogspot.com
April http://curlsandgrins.blogspot.com
Jamie - http://myamusinglife.blogspot.com
Anita-- http://www.anitaandbugs.blogspot.com
Sher B http://www.patternsbysher.blogspot.com
Amy http://www.lovetocrop.com
Gina http://californiascrappin-gcinderella21.blogspot.com/
Dena http://missdjones.blogspot.com/
Melinda http://thepaperthumb.blogspot.com
Shannon http://www.purplelionpaper.com/blog
Janet http://createatdreamscrapbooks.blogspot.com/
Tammy http://tampatha.wordpress.com
Barbara http://barbarab3.blogspot.com/

Sherry ~ http://www.upordowntheyrebeautiful.blogspot.com/
Christina http://cema1cema.blogspot.com
Kari http://purplefuntastickcreations.blogspot.com/
Theresa: http://www.thescrapbookingqueen.com
Vicki http://mawmawsthoughts.blogspot.com/
Mandie http://mandiesscrappin.blogspot.com/
Suzanne www.cricutcraftingrammy.blogspot.com/
Jearise http://lorbysworld.blogspot.com/


To be eligible for the grand prize, you must visit each blog and leave a comment. You also MUST visit Lisa's blog and leave a comment on Lisa's blog for the day and also become a follower at "Scrapping With Lisa" and her facebook page: http://www.facebook.com/pages/Scrapping-with-Lisa/130882060268842 . Please let her know if you don't do facebook and she won't count that against you for the blog candy. Now for the blog candy, Lisa has a great grab bag full of goodies.

Thanks for coming to day 2 of our Hop!!  Today's post is more die cuts to use for scrapbooking, cards, to decorate treat bags, etc.   Some of my pictures didn't save on my camera like I thought so I only have a couple of pictures. Not my usual pictures that I try to have step by step.  Sorry!!
Today I used the Happy Haunting cricut cartridge ( Have I told you how much I LOVE it?), I used black cardstock, purple cardstock, orange, and green cardstock, red stickles, adhesive and large pop dots (the kind the really pop up a project).

I cut the Headless Horseman, and the pumpkin @ 5".  First I cut the purple layer, then the black for the Horseman.  Then I cut the green layer, then the orange layers for the pumpkin.


Then I layered the black on top of the purple.  I layered the orange pumpkin on the green and added red stickles on the horse for his eye, then on the eyes of the pumpkin.  I then attached the pumpkin to the horseman's hand with a large pop dot.

I know you can't see it very well, but the pumpkin looked great with the red eyes!  I can't wait to use it on a scrapbook page.. I love the story of Ichabod Crane!! Soo Spooky!  Happy Halloween everyone!!

                                                             Now on to your next stop!

Have a great day and please stop back tomorrow for another great project!

Friday, October 7, 2011

What I love About Halloween/Fall Blog Hop Day 1

What I love about Halloween & Fall! Blog Hop I'm in!

Welcome to the What I Love About Fall/Halloween Blog Hop. This hop is scheduled from Oct. 7 at 8:00 am through Oct.8 at 11:00 pm(central time).

If you just happened to come to this blog, you can start at the beginning with Lisa Peters http://handmadewithlove-lisa.blogspot.com .   If you just came from Sherry's blog: http://www.upordowntheyrebeautiful.blogspot.com/ , then you are in the right spot!

We're so e...xcited to be doing this hop and we have a fabulous lineup with some very talented ladies. There will be lots of fun projects, along with some great blog candy, and a great grand prize for this hop.

The hop is a 2 day hop so you will have plenty of time to make it through the whole hop lineup twice. Check out each blog and see what blog candy you can win at the individual stops. Please come back both days to see great projects.

Here is the complete lineup:


Lisa- http://handmadewithlove-lisa.blogspot.com/
Lisa Pontious ~ http://honeybearzdesigns2011.blogspot.com/
Kristy ~ http://scraptasticalkreations.blogspot.com
April http://curlsandgrins.blogspot.com
Jamie - http://myamusinglife.blogspot.com
Anita-- http://www.anitaandbugs.blogspot.com
Sher B http://www.patternsbysher.blogspot.com
Amy http://www.lovetocrop.com
Gina http://californiascrappin-gcinderella21.blogspot.com/
Dena http://missdjones.blogspot.com/
Melinda http://thepaperthumb.blogspot.com
Shannon http://www.purplelionpaper.com/blog
Janet http://createatdreamscrapbooks.blogspot.com/
Tammy http://tampatha.wordpress.com
Barbara http://barbarab3.blogspot.com/

Sherry ~ http://www.upordowntheyrebeautiful.blogspot.com/
Christina http://cema1cema.blogspot.com
Kari http://purplefuntastickcreations.blogspot.com/
Theresa: http://www.thescrapbookingqueen.com
Vicki http://mawmawsthoughts.blogspot.com/
Mandie http://mandiesscrappin.blogspot.com/
Suzanne http://cricutcraftingrammy.blogspot.com/
Jearise http://lorbysworld.blogspot.com/

                                                                                                  
To be eligible for the grand prize, you must visit each blog and leave a comment. You also MUST visit Lisa's blog and leave a comment on Lisa's blog for the day and also become a follower at "Scrapping With Lisa" and her facebook page:  http://www.facebook.com/pages/Scrapping-with-Lisa/130882060268842 .   Please let her know if you don't do facebook and she won't count that against you for the blog candy. Now for the blog candy, Lisa has a great grab bag full of goodies.

Here is my project for today:  Sorry for some of the blurry pics,  I used my camera on my phone.  Next time I'll use my camera...


I was in a die cut swap and Here was the first project I did.  Supplies:  Mini Monsters cartridge, printed paper, black cardstock, google eyes, red stickles and adhesive.   The spider on the mini monster cartridge has a face on it.  I didn't want my cricut to cut out the face so I used a feature on my gypsy to hide the face before cutting the spider.


The spider was cut at 4" with the printed paper first, then with the black cardstock. 
Next I cut the legs off of the printed paper, and stuck the printed oval onto the black spider cut out.
Last I decorated the spiders with googly eyes and a red stickled mouth.  I think they turned out pretty cute! Thanks for stopping by my blog!


 Now on to your next stop!
Have a great day and please stop back tomorrow for another great project!

Friday, September 30, 2011

Mickey & Friends Blog Hop Day 2

                                                                                                            
Welcome to the first but not last Mickey & Friends Blog Hop. This hop is scheduled from Sept. 29 at 8:00 am through Sept. 30 at 11:00 pm.

If you have come from Janet's blog, you are on the right track. If not and you just happened to come to this blog, you can go back to the beginning HERE: Lisa http://handmadewithlove-lisa.blogspot.com and hop along with us.

We're so excited to be doing this hop and we have a fa...bulous lineup with some very talented ladies. There will be lots of fun projects, along with some great blog candy, and a great grand prize for this hop.

The hop is a 2 day hop so you will have plenty of time to make it through the whole hop lineup twice. Check out each blog and see what blog candy you can win at the individual stops. Please come back both days to see great projects.


Thank you so much for the wonderful comments on yesterday's post!!  I'm so sorry today I wanted to have a 2 page scrapbook layout done but was only able to have time to do one.  This week is Homecoming for my children and my son wanted me to help him make a super hero costume for one of the days.  It turned out really good if I do say so myself! A no sew project because I am not good with sewing!  I will post those pics later!  For today's project I made a Mulan page.  It is pretty simple, I had planned to do more with the second page.  As I had expressed in yesterday's post I'm not quite good with the paper piecing but I gave it another try again today.
Here is my list of supplies:

My cricut (of course!), Happily Ever After cricut cartridge, various colors of cardstock (some from Stampin Up! some from Archievers, glue stick, black pen and a tool I forgot to mention yesterday which is an excellent thing to have for paper piecing (a pick me up) It is pictured a little further down in my post.                                                                                  


I cut Mulan out at 5" to start but she was a little small so I went up to 6" and she looked much better! This page is for my daughter, she went to Disney World a couple of weeks ago and we have some great pictures of her with Mulan.  I will post the second page in a couple of days when it is complete. I just wanted to show you what I had done so far!  I didn't get her nose right, the pen I had wasn't fine enough.  I  still think she turned out ok though!! Here are the pictures from the rest of my project:


 Thank you so much for coming back today!! Thanks for the sweet comments and if you are a new follower I really appreciate it!! My mother introduced me to crafting at a young age and I love it!! She has passed away, but I have tried to pass down our love for scrapbooking/crafting to my children! We had many great times together with crafting and scrapbooking!

Here is the complete lineup:
Lisa http://handmadewithlove-lisa.blogspot.com
Shawnee http://blessedonthebrightside.com
Rachelle http://creationsbyrachelle.blogspot.com
Janet http://createatdreamscrapbooks.blogspot.com
Christina http://cema1cema.blogspot.com < you are here!!
Catarina http://docerelacreations.blogspot.com/ < this is your next stop!!
Shannon http://www.purplelionpaper.com/blog
Lynne http://slasewcraftiness.blogspot.com/
Indira http://craftyhomemade.blogspot.com/
Scrappin http://scrappindhilly.blogspot.com/
Jamie http://myamusinglife.blogspot.com
Suzanne http://cricutcraftingrammyblogspot.com/
Jearise http://lorbysworld.blogspot.com/
Jamie http://jmecreations.blogspot.com
Kristen http://fantabulouslypink.blogspot.com/
Susan http://susanascorner.blogspot.com/
Scrapping with lisa http://www.facebook.com/pages/Scrapping-with-Lisa/130882060268842

There is going to be an overall grand prize sponsored by Lisa from Scrapping with Lisa and she will be the first and last stop in the lineup. In order to qualify for the grand prize, you must leave a comment on every stop in the hop, including Lisa's facebook page. You also must become a follower of my blog and of Scrapping With Lisa on facebook. The grand prize for the blog hop is a nice grab bag full of goodies. You won't be disappointed in this prize.

Your next stop is Catarina http://docerelacreations.blogspot.com/ . Thanks for Hopping with us today!!

Thursday, September 29, 2011

Mickey & Friends Blog Hop day 1

Welcome to the first but not last Mickey & Friends Blog Hop. This hop is scheduled from Sept. 29 at 8:00 am through Sept. 30 at 11:00 pm.

If you have come from Janet's blog, you are on the right track. If not and you just happened to come to this blog, you can go back to the beginning HERE: Lisa http://handmadewithlove-lisa.blogspot.com and hop along with us.

We're so excited to be doing this hop and we have a fa...bulous lineup with some very talented ladies. There will be lots of fun projects, along with some great blog candy, and a great grand prize for this hop.

The hop is a 2 day hop so you will have plenty of time to make it through the whole hop lineup twice. Check out each blog and see what blog candy you can win at the individual stops. Please come back both days to see great projects.

My project for today is a photo holder using a big clothes clip.  I really love these and have made a lot of gifts with them!  They are great for a locker (just glue some magnet material to it), or your desk at work! I have one on my desk!

Here is a list of the materials I used:  A large clothes clip, Happily Ever After cricut cartridge, My Expression, several different colors of cardstock, printed card stock, fibers, large pop dots, my favorite adhesive, rubber cement, blue glitter glue, red stickles, black pen, white gel pen, paper cutter,& corner rounder.
                                                                  
                                                                                                                                                                            First I cut my black, yellow, blue, flesh color, and white card stock and placed them on my cricut mat.  I cut the shadow out in black, then the next layer which was Cinderella on white.  Then her hair, top of her dress, gloves and headband, face and arms/chest. All her pieces were cut at 4 1/2".  I got rid of the earring and eye pieces they were too hard to work with.  Then I started to assemble her here is a picture of some of my layers:   
                                    
I am new to the layers so I was having a hard time with the white spaces between the layers.  I know that you have to use your marker to outline but I was just having a hard time with the way it looked.  After all the layers were put together I did the outlining, used my blue glitter glue to give her blue eyes, and a blue earring.  Next I used the red stickles for her mouth.  After it dried I used the white gel pen to give her a white mouth inside. Next I measured and cut blue polka dot paper and glued it to the front and back of the clothes clip.  I tied white fibers to the sides, and cut a frame so a picture could be added later.  Here is the end product:
Hope you like it!  Thanks for stopping by!
                                                                                                                                                                             
Here is the complete lineup:                               
Lisa http://handmadewithlove-lisa.blogspot.com
Shawnee http://blessedonthebrightside.com
Rachelle http://creationsbyrachelle.blogspot.com
Janet http://createatdreamscrapbooks.blogspot.com
Christina http://cema1cema.blogspot.com  < you are here!!
Catarina http://docerelacreations.blogspot.com/ < this is your next stop!!
Shannon http://www.purplelionpaper.com/blog
Lynne http://slasewcraftiness.blogspot.com/
Indira http://craftyhomemade.blogspot.com/
Scrappin http://scrappindhilly.blogspot.com/
Jamie http://myamusinglife.blogspot.com
Suzanne http://cricutcraftingrammyblogspot.com/
Jearise http://lorbysworld.blogspot.com/
Jamie http://jmecreations.blogspot.com
Kristen http://fantabulouslypink.blogspot.com/
Susan http://susanascorner.blogspot.com/
Scrapping with lisa http://www.facebook.com/pages/Scrapping-with-Lisa/130882060268842

There is going to be an overall grand prize sponsored by Lisa from Scrapping with Lisa and she will be the first and last stop in the lineup. In order to qualify for the grand prize, you must leave a comment on every stop in the hop, including Lisa's facebook page. You also must become a follower of my blog and of Scrapping With Lisa on facebook. The grand prize for the blog hop is a nice grab bag full of goodies. You won't be disappointed in this prize.

Your next stop is Catarina http://docerelacreations.blogspot.com/ .  Thanks for Hopping with us today!!

Sunday, September 25, 2011

School Blog Hop Day 2

            
Welcome to the School Blog Hop! This is day two our blog hop in which we will feature different projects both days. I hope you enjoy yourself as you are hopping along. There will be a grand prize winner drawn from those who comment on all of the blogs both days. The grand prizes are from Cloud9 who is giving away a $20 gift certificate to their store. And Jens DigiStamps who will be giving away a $5 gift certificate to their store which is worth five digistamps. We would appreciate if you could take the time to check out their sites if you have time as we are happy to have them as our sponsors.

Cloud9
http://designsoncloud9.com
and their facebook page
http://www.facebook.com/pages/Designs-on-Cloud-9/189551027737837


Jens Digi Stamps
http://www.jensdigistamps.com


You should have come from Jessica's blog at http://scrappyluvs.blogspot.com/

Here is the line up in case you want to start from the beginning:

Jamie http://myamusinglife.blogspot.com
Berenice http://karbersweetescape.blogspot.com
Ashley http://theglamoroussideofscrapping.blogspot.com
Jessica http://scrappyluvs.blogspot.com/
Christina http://cema1cema.blogspot.com
Amber http://pixiperfectcreations.blogspot.com/
Dena http://missdjones.blogspot.com/
Deborah F. http://www.scrappingmamma.net
Shelley http://shelleysland.blogspot.com
Clare http://cricutcraftyclare.blogspot.com
April http://curlsandgrins.blogspot.com
Jearise http://lorbysworld.blogspot.com/
Kristy http://www.scraptasticalkreations.blogspot.com
Brynn http://flairandfrillscreativity.blogspot.com/
Janet http://createatdreamscrapbooks.blogspot.com/
Amy http://www.lovetocrop.com
Staci : http://preciousmem.blogspot.com
Lisa http://handmadewithlove-lisa.blogspot.com/
Cheryl http://cardsbycg.blogspot.com/
Gina http://californiascrappin-gcinderella21.blogspot.com/
Paula http://www.scrapyourworld1.blogspot.com
Crafty Homemade http://craftyhomemade.blogspot.com/
JulieK http://jk-littlebitofbling.blogspot.com/
Maria -http://www.mdcraftcorner.blogspot.com


Here's what I have for day two, hope you like it!!  I don't know if you are familiar with the "Smash" book but my project today is loosely based on this idea.  My daughter wanted to make this for a friend of her's from school.  The idea is to create a book that you can post things about friends, school and life in general almost like a journal.  Only cooler!

Here is a list of the supplies that we used:  My Your Story machine and 1 cover, Cricut Expression, Fabulous Finds cartridge, cricut Phrases cartridge, Hello Kitty cartridge, Hannah Montana cartridge, various scrap cardstock and decorative papers, jewels, & adhesive.
                                                                  
I first warmed up my Your Story machine, while it was warming up I cut several pieces of cardstock for the pages of our "Smash-type" book. After they were cut we put them in the order that my daughter wanted them and placed them in the cover, slid them in the "Your Story" machine and pushed the start button. This was the first time I used my Your Story machine, LOVE it!! ** One thing I forgot to do before I binded the pages was to score each page.  I had to go back and score the pages after, which was a little hard to do**
                                                                           
 While it was binding the pages to the cover we cut several different phrases,images, and frames from the Phrases cartridge we cut them various sizes ranging from 2-3" the frames were cut at 4" from the Fabulous Finds cartridge.  We also used the negative image from the Hello Kitty card from yesterday (I try to save my scraps you never know what you can use them for in another project) and my daugher stuck it down to one of the pages inside the book. (It looked super cute!!)

Then we cut a heart from Hannah Montana cartridge along with her friends name to decorate on the front cover.  We ended up not using the ribbon, but it would be cute if you wanted to! There are so many great things you could use for this project!  Here is a picture of the cover we left room on the front in case she wanted to put a picture on it:                                                                                      
Hope you like our project for today!! Thanks for hopping along with us today!! Now on to your next stop:      Amber http://pixiperfectcreations.blogspot.com/                                                                         


Saturday, September 24, 2011

School Blog Hop!!


Welcome to the School Blog Hop! This is a two day blog hop in which we will feature different projects both days. I hope you enjoy yourself as you are hopping along. There will be a grand prize winner drawn from those who comment on all of the blogs both days. The grand prizes are from Cloud9 who is giving away a $20 gift certificate to their store. And Jens DigiStamps who will be giving away a $5 gift certificate to their store which is worth five digistamps. We would appreciate if you could take the time to check out their sites if you have time as we are happy to have them as our sponsors.

Cloud9
http://designsoncloud9.com
and their facebook page
http://www.facebook.com/pages/Designs-on-Cloud-9/189551027737837


Jens Digi Stamps
http://www.jensdigistamps.com


You should have come from Jessica's blog at  http://scrappyluvs.blogspot.com/

Here is the line up in case you want to start from the beginning:

Jamie http://myamusinglife.blogspot.com
Berenice http://karbersweetescape.blogspot.com
Ashley http://theglamoroussideofscrapping.blogspot.com
Jessica http://scrappyluvs.blogspot.com/
Christina http://cema1cema.blogspot.com
Amber http://pixiperfectcreations.blogspot.com/
Dena http://missdjones.blogspot.com/
Deborah F. http://www.scrappingmamma.net
Shelley http://shelleysland.blogspot.com
Clare http://cricutcraftyclare.blogspot.com
April http://curlsandgrins.blogspot.com
Jearise http://lorbysworld.blogspot.com/
Kristy http://www.scraptasticalkreations.blogspot.com
Brynn http://flairandfrillscreativity.blogspot.com/
Janet http://createatdreamscrapbooks.blogspot.com/
Amy http://www.lovetocrop.com
Staci : http://preciousmem.blogspot.com
Lisa http://handmadewithlove-lisa.blogspot.com/
Cheryl http://cardsbycg.blogspot.com/
Gina http://californiascrappin-gcinderella21.blogspot.com/
Paula http://www.scrapyourworld1.blogspot.com
Crafty Homemade http://craftyhomemade.blogspot.com/
JulieK http://jk-littlebitofbling.blogspot.com/
Maria -http://www.mdcraftcorner.blogspot.com

Now on to my project!!

I decided to make a "lunch" tote.  This tote could also double as a make-up bag for you to keep in your locker at school.
I really love using my cricut to cut fabric to iron on stuff!! Here is the list of supplies I used:

My Cricut Expression, White fabric, Wonder Under, Small tote bag, A HOT iron, and the Cricut Cartridge Hello Kitty Greetings.
For the gift card I used my Cricut Expression, Hello Kitty Greetings Cartridge, white cardstock, black cardstock, pink stickles, a hole punch, some Hello Kitty ribbon, and your favorite adhesive.

First I cut out a pattern using cardstock so I could see how big I wanted my design to be. I used the silhouette Hello Kitty on pg 29 cut at 5".
                                                             
                                                                      
Since I decided this would be the perfect size I started the next step.  I ironed my fabric wrong side down on the wonder under with a hot iron and let it cool.  I then placed it on my mat wonder under side down, making sure it was down tight. If you don't it can come up while it is cutting.(This has happened to me before!) I then loaded my mat and hit repeat last making sure to turn your speed down, you don't want it to cut out your project too fast or it can tear.  Once it was cut I took the silhouette Kitty and pulled off the backing of the wonder under and layed it out on my bag. I did the same to the eyes and nose. Once again using a hot iron I ironed the pieces on the front of the bag. I let it cool and took the negative image (the solid kitty, and bow) and did the same to the back of the bag.

                                                                                                                                                          I then made a really cute card to go with it!  I used the same cut as I did on the bag only I cut the silhouette out at 4" and used black cardstock.  On the same page of the Cricut cartridge I cut the card out by using the card feature, cut with white cardstock at 4" too.  I used adhesive to stick the black silhouette on the front of the card did the same for the eyes and nose. Next I used some pink stickles on the bow (it might be a little hard to see in the picture).  I then used my hole punch to punch a hole in the top and added some Hello Kitty ribbon that I got on clearance at Walmart.
                                                                              
I really think it turned out cute! I really like this cartridge!! Now remember to come back tomorrow and I will have another project!!  On to your next stop:

Amber http://pixiperfectcreations.blogspot.com/