Saturday, December 3, 2011

Christmas Cards & Cookies Blog Hop Day 2!!


Welcome back to day 2 of our Christmas Cards & Cookies Blog Hop!  I just know you are finding a lot of great recipes and ideas for the Holiday!  I absolutely love to make Cookies, candies, and Hot Chocolate this time of year!

So welcome back to Round One of the Christmas Cards & Cookies Blog Hop! This is day 2!  You should have come from Carol: http://huffandpuffscrap.blogspot.com/ . If you are starting here and wish to hop from the beginning of the hop, please visit Dena’s blog : http://missdjones.blogspot.com

There was so much response to the Christmas Cards & Cookies Blog Hop that it had to be split between two weekends. This is Round One and begins Saturday, Dec. 3rd, continuing through Sunday, Dec. 4th. Round Two will be held next weekend. We have a talented group of women who love papercrafting and baking. Each of them is sharing a recipe for a yummy Christmas treat along with a Christmas card or tag. Hopefully, you’ll pick up some great ideas for your own Christmas gift giving this season. So, grab a cup of coffee, sit back, and enjoy!

So today I'm going to show you how I decided to package these goodies this year.
Here are my list of supplies:

Doodle Charms Cricut Cartridge,  a tag from Office Depot ( I buy a big stack of them), blue polka dot papper, a piece of red paper cut into a rectangle, a crop-a-dile, slate large eyelet, google eyes, Xyron create a sticker, glitter, black pen, pop dot, red fibers, black Stampin Up ink, Stampin Up! glitter, Warm Words stamp from Stampin Up! and a plastic bag from Walmart in the cake decorating section.

I cut the reindeer on page 126 of the Doodle Charms Cartridge at 3 1/2". I removed the string that was on the tag. Next I traced the tag onto the polka dot paper, cut it out and stuck it to the tag. I used the crop-a-dile to punch a hole and place the eyelet. Then I added the red fibers through the new hole. Next I took the nose and ran it through the Xyron backwards and removed it from the sticky side and placed it into a pile of glitter.  Shook it a little, pressed the glitter down with my fingers and it stuck pretty nicely!  I then assembled the reindeer, added google eyes and used a pop dot to place it on the tag.  Then I took the rectangle piece and cut out the middle, glued it onto the tag below the reindeer.  Stamped my sentiment in the middle of it.

I found these great bags at Walmart that were shaped a little differently the perfect size for a little snack!  I filled them up with the nuts and tied the tag on. 


Hope you liked the rest of my project!  Thanks for taking a look today!  I hope you get even more great ideas today!

♥♥ Christina ♥♥

Next stop:  Staci McD http://preciousmem.blogspot.com/

Below if the complete blog hop lineup:

1) Dena : http://missdjones.blogspot.com/
2) Robin : http://scrapandchat.blogspot.com/
3) Janet N: http://createatdreamscrapbooks.blogspot.com/
4) Carla: http://racincrafts.blogspot.com/
5) Zenita: http://www.scrappinwithz.blogspot.com
6) Jennifer: http://www.craftycardgallery.blogspot.com/
7) Kari: http://purplefuntastickcreations.blogspot.com/
8) Susan: http://susanascorner.blogspot.com/
9) JulieK: http://jk-littlebitofbling.blogspot.com/
10) Ellen ♥ CardMonkey: http://www.cardmonkey-business.blogspot.com
11) Kerri: http://crafttimeandcupcakes.blogspot.com/
12) Janet S: http://www.ladyluvbug.blogspot.com/
13) Carol: http://huffandpuffscrap.blogspot.com/
14) Christina http://cema1cema.blogspot.com/
15) Staci McD http://preciousmem.blogspot.com/
16) Pam http://pammejo-scrapbookflair.blogspot.com/
17) Maria http://marlm-creativebydesign.blogspot.com/
18) Nicolette- www.beyondscrapin.blogspot.com

Friday, December 2, 2011

Christmas Cards & Cookies Blog Hop!


Welcome to Round One of the Christmas Cards & Cookies Blog Hop! You should have come from Carol: http://huffandpuffscrap.blogspot.com/ . If you are starting here and wish to hop from the beginning of the hop, please visit Dena’s blog : http://missdjones.blogspot.com

There was so much response to the Christmas Cards & Cookies Blog Hop that it had to be split between two weekends. This is Round One and begins Saturday, Dec. 3rd, continuing through Sunday, Dec. 4th. Round Two will be held next weekend. We have a talented group of women who love papercrafting and baking. Each of them is sharing a recipe for a yummy Christmas treat along with a Christmas card or tag. Hopefully, you’ll pick up some great ideas for your own Christmas gift giving this season. So, grab a cup of coffee, sit back, and enjoy!

My son and I love the spiced nuts that you can get at the mall so much!  They are so expensive!  So I did a little digging and found a fantastic recipe!  Now we have spiced nuts every Christmas! So for today's project I though I would give you the recipe and show you how I make them.  Please stop back tomorrow so I can show you the packaging I made for this great treat too!

Recipe:      1 Egg White
                  1 Tablespoon of Water
                  1 Pound of nuts ( I used pecans, you can use whatever you like)
                  1 Cup granulated sugar
                  3/4 Teaspoon salt (if you use salted nuts omit the salt)
                  1/2 Teaspoon Ground cinnamon
                  1/4 Teaspoon All spice

Heat your oven to 250* F.  Grease a cookie sheet and set it aside.  In a small bowl mix the sugar, salt, cinnamon, and all spice.  Set it aside.  Place the nuts in a large mixing bowl, set it aside.  In a small bowl whip the egg white and water together until it is frothy.  Pour over the nuts and coat them well.  After the nuts are coated with the egg white mixture add the sugar/spice mixture and coat well.  Spread the nuts onto the greased cookie sheet and place in the oven.  Bake for 1 hour, turning the nuts every 15 minutes until done.  Cool. 
I really think your going to love this recipe! It is the best one I have found so far! I like to give them away in cute packaging to my friends!  Happy Baking!!

I'm so glad you stopped by!! Don't forget to come back tomorrow and see the finished product!  Be sure to Hop on to the next stop for more fantastic ideas!!  Your next stop is Staci McD http://preciousmem.blogspot.com/


♥♥ Christina ♥♥

Below if the complete blog hop lineup in case you get lost along the way:

1) Dena : http://missdjones.blogspot.com/
2) Robin : http://scrapandchat.blogspot.com/
3) Janet N: http://createatdreamscrapbooks.blogspot.com/
4) Carla: http://racincrafts.blogspot.com/
5) Zenita: http://www.scrappinwithz.blogspot.com
6) Jennifer: http://www.craftycardgallery.blogspot.com/
7) Kari: http://purplefuntastickcreations.blogspot.com/
8) Susan: http://susanascorner.blogspot.com/
9) JulieK: http://jk-littlebitofbling.blogspot.com/
10) Ellen ♥ CardMonkey: http://www.cardmonkey-business.blogspot.com
11) Kerri: http://crafttimeandcupcakes.blogspot.com/
12) Janet S: http://www.ladyluvbug.blogspot.com/
13) Carol: http://huffandpuffscrap.blogspot.com/
14) Christina http://cema1cema.blogspot.com/
15) Staci McD http://preciousmem.blogspot.com/
16) Pam http://pammejo-scrapbookflair.blogspot.com/
17) Maria http://marlm-creativebydesign.blogspot.com/
18) Nicolette- www.beyondscrapin.blogspot.com

Sunday, November 13, 2011

Giving Back Blog Hop!


Welcome to the Giving Back Blog Hop! We wanted to give back to the person who has given so much to us! So, this is in honor of Erica from My Cricut Craftroom.  She is such a kind and caring person!  We wanted to do something kind for her!

You should have come from Rosa at:  http://kleymanr.blogspot.com/ . If you are starting at my blog, you will want to start with Kat’s Blog: http://katscrapfever.blogspot.com so you don’t miss any of the great layouts. When you get done hopping, you will want to go to Erica’s Facebook  Page :  http://www.facebook.com/EricasCraftRoom   and leave a comment on her page. We will be randomly selecting someone from those comments to win blog candy.

So for my page I know that Erica loves Christmas, and if you have ever visited her blog you would know how much!!  I decided to do a " Secret Santa" theme!

I used The Forever Young, Rock Princess, Sketch Your Imagination, & Elegant Edges Cricut Cartridges.  I used a white and red slick marker, Printed papers from DCWV, solid cardstock from Stampin Up!, a misc. Santa Hat I had purchased from Michaels on a clearance from their card decorations, red and clear stickles, Stampin Up! square punch, and misc. fibers from my stash.

I cut the "Santa" gal from the Forever Young cartridge (she is the first one in the book) at 4 3/4".
I cut her hair off and cut new hair from Rock Princess (pg 30) at 2 3/4" . ( I had to play with this a little to get the right size for her, and I had to use my flip feature on my expression.  I colored her shoes with my red slick marker, and the buttons on her shirt with my white slick marker.  I stuck her hat on with a glue dot.
The tree I cut from Sketch Your Imagination cartridge at 5".  I used my red stickles on the bulbs and the clear stickles on the star.  I cut the presents with my Stampin Up! square punch and tide fibers to them.
Then I cut out the background with the Elegant Edges cartridge  "loops" (pg 35) at 7"
Here is a close up picture of my "Santa" gal and the Tree:

I added a pop dot to "Secret Santa gal" only to the bottom half so Erica could put a picture behind her.  And I added a pop dot to the yellow package in her hand.  And here is the finished page:


Thanks for Hopping with us!! I hope you enjoyed my project, I really hope Erica likes it too!!

Now your next stop is the talented:  Madison!  http://www.funkycards.blogspot.com/

The entire lineup in case you get lost is listed below:

Kat:       http://katscrapfever.blogspot.com
Heather:http://papercrafteranonymous.com
Melissa: http://pinkpolkadotscrapping.blogspot.com
Judith:    http://grammiejudys.blogspot.com
Lezlye:   www.lezlyes.blogspot.com
Gayle:      http://gscraptime.blogspot.com/
Sue Ann:  http://suzyssimplecrafts.blogspot.com
Tammy:   http://crazycardcreator.blogspot.com
Rosa:        http://kleymanr.blogspot.com/
Christina: http://cema1cema.blogspot.com  ~~ You are here!  ~~
Madison:  http://www.funkycards.blogspot.com/ ~~Your Next Stop ~~
Patricia:    http://micraftygal.blogspot.com
Samantha: http://samanthascricutcreations.blogspot.com/
Ricki:        http://manicexpressionsdesigns.blogspot.com/
Pattie:       http://sweetpsscrapbooks.blogspot.com/
Amanda:   http://craftsbyamanda.blogspot.com
Connie:     http://conniescraftycloset.blogspot.com
Tina:         http://craftyandgreen.blogspot.com
Lisa:         http://allmadebylisa.blogspot.com
Enjoli:      http://mississippihippycrafts.blogspot.com
Shelly:      http://kccroppers.blogspot.com
Karey:      http://www.creativecraftcorner.com
Laurie:     http://www.lauriecandoit.blogspot.com

Please don't forget to stop by Erica's facebook page at: http://www.facebook.com/EricasCraftRoom and leave a comment for some blog  candy!  

~~ Christina ♥ ~~

Friday, November 4, 2011

What I'm Thankful for Blog Hop day 2

Welcome to the "What I Am Thankful For" Blog Hop. This hop is scheduled from Nov. 4 at 8:00 am through Nov. 5 at 11:00 pm (central time).

If you just happened to come to this blog, you are at the beginning with Lisa Peters http://handmadewithlove-lisa.blogspot.com/.

We're so excited to be doing this hop and we ...have a fabulous lineup with some very talented ladies. There will be lots of fun projects, along with some great blog candy, and a great grand prize for this hop.

The hop is a 2 day hop so you will have plenty of time to make it through the whole hop lineup twice. Check out each blog and see what blog candy you can win at the individual stops. Please come back both days to see great projects.

Here is the complete lineup:
Lisa http://handmadewithlove-lisa.blogspot.com/

Ashley http://theglamoroussideofscrapping.blogspot.com

Jamie http://myamusinglife.blogspot.com

Cathie http://cathiescafe-scraphappy.blogspot.com/
April http://www.curlsandgrins.blogspot.com/
Sherry B http://www.patternsbysher.blogspot.com

Anita http://www.anitaandbugs.blogspot.com
Gina http://californiascrappin-gcinderella21.blogspot.com/

Amy http://www.lovetocrop.com

Janet http://www.createatdreamscrapbooks.blogspot.com/

Shawnee http://www.blessedonthebrightside.com
Rachelle http://www.creationsbyrachelle.blogspot.com

Amber http://pixiperfectcreations.blogspot.com/

Barbara http://barbarab3.blogspot.com

Sherry W http://www.upordowntheyrebeautiful.blogspot.com/

Christina http://cema1cema.blogspot.com

Linda http://lindascreativity.blogspot.com

Theresa http://www.thescrapbookingqueen.com

Vicki http://mawmawsthoughts.blogspot.com/

Suzanne http://cricutcraftingrammy.blogspot.com/

So for day 2 I decided to do another scrapbook page.  Going with the Theme that I never have pictures of Thanksgiving I decided I would do one of all the great cooking!  I thought I would take some pictures of preparing for dinner. 
I used 4 cartridges for this scrapbook page.  Forever Young, From my Kitchen, Doodle Charms, and Gypsy font.  I used my gypsy, black, white, patterened, pink, & brown cardstock.  My black pen, white galaxy marker, and adheisive and pop dots. 
The "mom" was cut from Forever young at 5".  The Apron was cut from From my Kitchen at 2 1/2". This one I had to cut a couple of times to get the size to match up with the "mom".  The stove was cut from From My Kitchen at 2 1/2" (also cut a few times for sizing).  The turkey was cut from Doodle Charms at 1" and it too had to be cut a couple of times to get the right sizing.  "Its Turkey Time" was cut from Gypsy wanderings and welded together at about 3".  After I layered the Mom's clothes and apron I put pop dots on her.  I also used pop dots on the turkey to make it stand out a bit.

I really love the Forever Young cartridge, you can do so much with it!  I hope you like my page!

Don't forget to be eligible for the grand prize, you must visit each blog, leave a comment and then become a follower of every participant in this hop. You also MUST visit Lisa's blog and leave a comment on Lisa's blog for the day and also become a follower at "Scrapping With Lisa" and her facebook page: http://www.facebook.com/pages/Scrapping-with-Lisa/130882060268842. Please let Lisa know if you don't do facebook and She won't count that against you for the blog candy. Now for the blog candy, I bet you are wondering what it could be. It will be a grab bag full of goodies.

Hope you are getting inspired with new ideas along the way!  Thanks for stopping by! ~Christina~
On to your next stop: Linda http://lindascreativity.blogspot.com

What I Am Thankful For blog hop day 1

Welcome to the "What I Am Thankful For" Blog Hop. This hop is scheduled from Nov. 4 at 8:00 am through Nov. 5 at 11:00 pm (central time).

If you just happened to come to this blog, you are at the beginning with Lisa Peters http://handmadewithlove-lisa.blogspot.com/.

We're so excited to be doing this hop and we ...have a fabulous lineup with some very talented ladies. There will be lots of fun projects, along with some great blog candy, and a great grand prize for this hop.

The hop is a 2 day hop so you will have plenty of time to make it through the whole hop lineup twice. Check out each blog and see what blog candy you can win at the individual stops. Please come back both days to see great projects.

Here is the complete lineup:
Lisa  http://handmadewithlove-lisa.blogspot.com/

Ashley  http://theglamoroussideofscrapping.blogspot.com

Jamie  http://myamusinglife.blogspot.com

Cathie  http://cathiescafe-scraphappy.blogspot.com/
April  http://www.curlsandgrins.blogspot.com/
Sherry B  http://www.patternsbysher.blogspot.com

Anita   http://www.anitaandbugs.blogspot.com
Gina  http://californiascrappin-gcinderella21.blogspot.com/

Amy  http://www.lovetocrop.com

Janet  http://www.createatdreamscrapbooks.blogspot.com/

Shawnee  http://www.blessedonthebrightside.com
Rachelle  http://www.creationsbyrachelle.blogspot.com

Amber http://pixiperfectcreations.blogspot.com/

Barbara http://barbarab3.blogspot.com

Sherry W http://www.upordowntheyrebeautiful.blogspot.com/

Christina http://cema1cema.blogspot.com

Linda http://lindascreativity.blogspot.com

Theresa http://www.thescrapbookingqueen.com

Vicki http://mawmawsthoughts.blogspot.com/

Suzanne http://cricutcraftingrammy.blogspot.com/

For my day 1 project I wanted to do a simple scrapbook page.  I never seem to get a picture of my whole family at Thanksgiving.  I am usually busy cooking.  I decided if I make a scrapbook page then I would have to at least get a couple of pictures.  I am very Thankful for my family!
I used The Desginers Calendar, and Gypsy wanderings cricut cartridges.  Navy, striped, white, brown, black and red scrapbooking paper. I used my gypsy, white galaxy marker, red stickles, and star dust stickles. 


 I cut the "Family" from gypsy wanderings cartridge at 3 1/2", the "Give Thanks" from the  Designer's Calendar at 4", and the Pilgrim hat from Designer's Calendar at 3 1/2".  I cut 2 frames from the striped paper.  Stickled the G and E, and the T and S with the xmas red stickles.  I also stickled the buckle on the hat with the stardust stickles. 


To be eligible for the grand prize, you must visit each blog, leave a comment and then become a follower of every participant in this hop. You also MUST visit Lisa's blog and leave a comment on Lisa's blog for the day and also become a follower at "Scrapping With Lisa" and her facebook page: http://www.facebook.com/pages/Scrapping-with-Lisa/130882060268842.   Please let Lisa know if you don't do facebook and She won't count that against you for the blog candy. Now for the blog candy, I bet you are wondering what it could be. It will be a grab bag full of goodies.

Thanks for taking a look at my project!  Don't forget to come back tomorrow to see my other project, and all of the other great projects! ~Christina~
 Now on to your next stop: Linda http://lindascreativity.blogspot.com

Monday, October 31, 2011

Made it myself Monday!

BLOG TITLE
Hi!!  I'm so excited to share a project for Made It Myself Monday's  on You Had Me At Craft's blog!

Happy Halloween Everyone!  Here is my project:

I used my Mini Monster's Cricut cartridge page 42 the ghosts cut at 2 3/4", black pen, googly eyes, white cardstock, and adhesive.

I love to make treat bag toppers, I'm just showing the ghost that I made for the bags.  I forgot to take a picture of the finished bags!  These were really easy to make for a large class.

Thanks for stopping by! ~Christina~

Saturday, October 29, 2011

The Great Pumpkin Blog Hop! Day 1


This is a TWO-DAY blog HOP, and it is all about the pumpkins!! From cards and layouts to awesome 3D projects, you'll enjoy a collection of fabulous ideas from some fabulously creative friends!! Be sure to stop on by for each day of the hop as there will be NEW ideas on Saturday AND Sunday!! You won't want to miss a thing!! Prizes will be offered for visitors of DAY ONE and visitors of DAY TWO, but A GRAND PRIZE will be offered to those who choose to hop and comment on BOTH DAYS!! :) Hope to see you there!!

The official hop start times are as follows (you can join in on the hop anytime after the start time -- The GRAND PRIZE opportunity will be open until WEDNESDAY, November 2nd):

3am Alaska
4am Pacific
5am Mountain
6am Central
7am Eastern

Hello, and WELCOME to the The GREAT PUMPKIN Blog Hop!! We're so excited that you could join us for this WONDERFUL two-day hop!! Please be sure to visit BOTH days for maximum ideas, maximum FUN, and maximum chances to WIN!! Our hostess, Amy at: http://www.lovetocrop.com  has some SUPER prizes for a few hoppers, so be sure to check out all of those details on her blog!!

If you have hopped here from  Jessica ~ http://thecreativestamperspot.blogspot.comthen you have arrived at the perfect spot in the pumpkin patch!! If you are just popping in to visit, please take a trip back to Amy's Blog ( http://www.lovetocrop.com ) to start at the beginning -- with all the pumpkins in the patch, you'll want to be sure to see them all!!

I love pumpkins!!  For my project I created toppers for treat bags for my son's class for his Birthday which is on Halloween!

I used the Mini monsters Cricut cartridge, orange paper, green paper, black paper, google eyes, and a white souffle pen from sakura & my favorite adhesive and glue dots.


I cut the pumpkin and the mouth and leaf topper at 2 1/2".  I then used the Souffle pen to color in the the teeth.  I could have used white cardstock, but I really have a hard time with little pieces so I thought I would give this a try.  When coloring in the teeth the white was light at first but as it dried it turned out great!! Just what I wanted!!


Next I glued everything down.  I decided to use the Souffle pen to color in the white part of the outside of one of the eyes too because I didn't want to cut it out of cardstock.  I was not disappointed in this either!!


Here are the finished pumpkins! I love how they turned out! Now to buy more candy! My family ate all the candy I bought for the treat bags! You would think I would learn this lesson because it happens every year!  Hope you liked my project! Thanks for coming by and please hop on! There are a lot more great projects!  ~ Christina~

Now on to your next stop!   Brenda ~ http://createbyburffrau.blogspot.com/

If you get lost along the way here is the complete line up:

1. Amy ~ http://www.lovetocrop.com/
2. Melissa ~ http://acreativejourneywithmelissa.blogspot.com/
3. Ashley ~ http://theglamoroussideofscrapping.blogspot.com
4. Anita ~ http://www.anitaandbugs.blogspot.com/
5. Nancy ~ http://blog.fancywithnancy.com/
6. Shannon ~ http://www.purplelionpaper.com/blog
7. Amber ~ http://pixiperfectcreations.blogspot.com
8. Linda ~ http://www.lindascreativity.blogspot.com/
10. Colleen ~ http://www.cbcscrapbooking.blogspot.com
11. Jennifer ~ www.craftycardgallery.blogspot.com
12. Lisa ~ http://handmadewithlove-lisa.blogspot.com
13. Nicolette ~ www.beyondscrapin.blogspot.com
14. April ~ http://www.curlsandgrins.blogspot.com
15. Theresa ~ www.thescrapbookingqueen.com
16. Jessica ~ http://thecreativestamperspot.blogspot.com
18. Christina ~ http://cema1cema.blogspot.com (SATURDAY ONLY -- )
19. Brenda ~ http://createbyburffrau.blogspot.com/
20. Jamie ~ http://myamusinglife.blogspot.com/
21. Maria ~ http://www.mdcraftcorner.blogspot.com/
22. Sherry ~ http://www.patternsbysher.blogspot.com

Tuesday, October 18, 2011

I love to craft!!

Hi my friends! I love to make gifts to give away! (When I find the time!)  One of my friends just had a beautiful baby boy and I knew that I wanted to make something for him!
I really like making shirts and cutting fabric with the cricut.
Here is a list of the supplies I used:
1 blue onsie (bought it at Hobby Lobby), white fabric, green fabric, brown fabric, tan fabric, wonder under, hot iron, deep cutting blade, and my Create a critter cartridge.
For the card: white cardstock, green cardstock, brown cardstock, tan cardstock, blue cardstock & pop dots.
I layered blue cardstock on my white card I made from the white cardstock.
I made the monkey for the card first because I wanted to make sure all the colors worked well together. I cut the monkey at 3 1/2" from Create a critter on page 46. I also cut the vine from that page. Layered the monkey and added pop dots on the back. Stuck the vine down first then added the monkey.
I then ironed 6 x 6 squares of each color of fabric to my wonder under then placed each one on my sticky 12 x 12 cricut mat.  For this project I had to use the deep cutting blade because some of my fabric was pretty thin and the regular blade tore the fabric. Using the same method I have used before: pressure high, speed low I cut each layer.  I cut the monkey and vine at 3 1/2" also.  I then ironed on the vine first, then the dark brown layer, the white layer and last the tan layer.  I think it turned out pretty cute!  Thanks for visiting!  Christina

Saturday, October 15, 2011

My Cricut Craftroom's Fall Favorites Blog Hop Day 2!!


Welcome to My Cricut Craft Room's Fall Favoites Blog Hop! This is a two day hop! Today is day 2!!
You should have started at http://mycricutcraftroom.blogspot.com/ if not please start at the beginning.

Thank you for coming back to see the rest of my project! If you are just joining the Hop make sure you start with Day 1 to see all the great projects!  Thank you for all the wonderful comments and new followers welcome! 
I really love making scrapbook pages, although I never know what pictures I am going to use and sometimes I have to squeeze in more pictures because I tend to take a lot!
Here is the list of supplies I used to make the scrapbook pages:  Martha Stewarts Drippy Goo punch, American Crafts Creepy phrases stickers (the saying), black cardstock, Imaginisce Hallowhimsy glimmer paper pad (the striped paper), adhesive and glue pop dots & my mummy, and witch cuts from yesterday.


First I cut some paper to mat my photo's on and cut the bottom with the Martha Stewart punch. Then I added my saying to one of the mats, and placed everything on my 12 X 12 striped paper.  I really love the colors in this paper!! Here is a picture of both pages together:

Here are the pictures of each individual page:
Here is the second page:
I hope you liked my pages!  Now on to your next stop:


In case you loose your way here is the complete hop list, Happy Hopping!!


Erica http://mycricutcraftroom.blogspot.com/
Yvette http://gammascreativecorner.blogspot.com/
Samantha http://samanthascricutcreations.blogspot.com/
Shelly http://kccroppers.blogspot.com/

Gayle http://gscraptime.blogspot.com
Erica’s project http://ericascraftroom.blogspot.com/2011/10/my-creation-for-this-weekend.html
Connie http://conniescraftycloset.blogspot.com/
Lori http://www.scrappinmystressaway.blogspot.com/
Christina Capps http://www.cema1cema.blogspot.com/ you are here
Amy
http://scrapthissavethat.blogspot.com/ next
Erica’s Blog Candy http://ericasblogcandy.blogspot.com/

Friday, October 14, 2011

My Cricut Craftroom's Fall Favorites Blog Hop!!


Welcome to My Cricut Craft Room's Fall Favoites Blog Hop! This is a two day hop!
You should have started at http://mycricutcraftroom.blogspot.com/ if not please start at the beginning.

I love fall! Halloween is one of my favorite times!  Today I am going to show you a couple of projects using the Cricut Cartridge Happy Hauntings. It is one of my favorite cartridges!!  I will show you a couple of the cuts and how I put them together.  Here is my first cut:   

This is the mummy from page 32.  I cut him out @ 4 1/2" of black paper first then I cut him out of green paper at 4 1/2" also cutting out the extra arm.  I added a foam pop dot to the extra arm. Next I chalked him around the edges with some black Stampin Up! chalk and added red stickles to his eyes. Here is the picture of  Mr. Mummy finished:

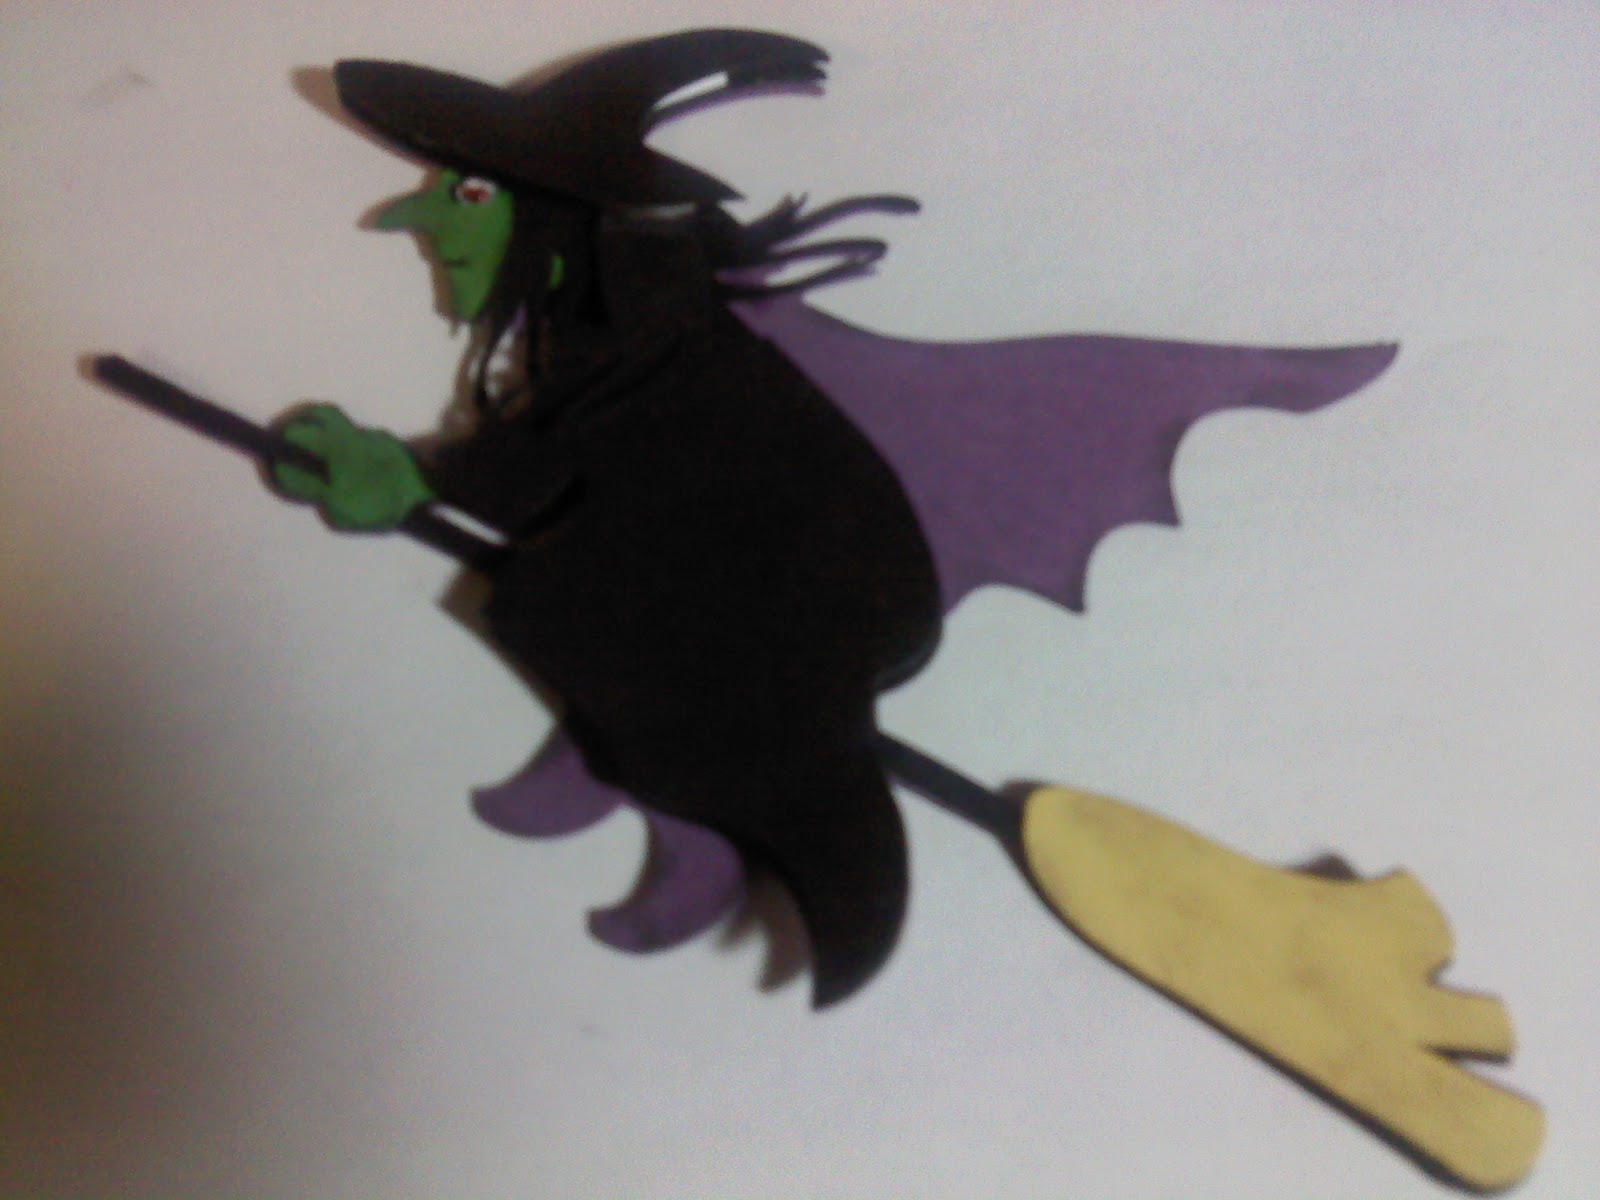
For my next cut I used the Witch on page 34 of  Happy Hauntings.
I cut her out at 4 3/4" from purple and black.  I actually cut the black 3 times to use her hair in different places.  I cut her face out of green cardstock, and the bottom of the broom in yellow.  I layered 1 black witch on top of the purple one, then cut the body, hair, and hat from another witch.  Added a pop dot to the body and the hat and glued on both cuts of hair to her.  I then used black chalk around her edges.  I used a white gel pen on her eye and red stickles too.  I'm really loving stickles!   Here is the finished witch:  
Please check back tomorrow and I will have both of my projects made into a 2 page layout.  Thanks for stopping by!!  Now on to your next stop! 

  In case you loose your way here is the complete hop list, Happy Hopping!!


Saturday, October 8, 2011

What I love about Halloween/Fall Blog Hop Day 2


Welcome to the What I Love About Fall/Halloween Blog Hop. This hop is scheduled from Oct. 7 at 8:00 am through Oct.8 at 11:00 pm(central time).

If you just happened to come to this blog, you can start at the beginning with Lisa Peters http://handmadewithlove-lisa.blogspot.com . If you just came from Sherry's  blog:  http://www.upordowntheyrebeautiful.blogspot.com/ , then you are in the right spot!

We're so e...xcited to be doing this hop and we have a fabulous lineup with some very talented ladies. There will be lots of fun projects, along with some great blog candy, and a great grand prize for this hop.

The hop is a 2 day hop so you will have plenty of time to make it through the whole hop lineup twice. Check out each blog and see what blog candy you can win at the individual stops. Please come back both days to see great projects.

Here is the complete lineup:


Lisa- http://handmadewithlove-lisa.blogspot.com/
Lisa Pontious ~ http://honeybearzdesigns2011.blogspot.com/
Kristy ~ http://scraptasticalkreations.blogspot.com
April http://curlsandgrins.blogspot.com
Jamie - http://myamusinglife.blogspot.com
Anita-- http://www.anitaandbugs.blogspot.com
Sher B http://www.patternsbysher.blogspot.com
Amy http://www.lovetocrop.com
Gina http://californiascrappin-gcinderella21.blogspot.com/
Dena http://missdjones.blogspot.com/
Melinda http://thepaperthumb.blogspot.com
Shannon http://www.purplelionpaper.com/blog
Janet http://createatdreamscrapbooks.blogspot.com/
Tammy http://tampatha.wordpress.com
Barbara http://barbarab3.blogspot.com/

Sherry ~ http://www.upordowntheyrebeautiful.blogspot.com/
Christina http://cema1cema.blogspot.com
Kari http://purplefuntastickcreations.blogspot.com/
Theresa: http://www.thescrapbookingqueen.com
Vicki http://mawmawsthoughts.blogspot.com/
Mandie http://mandiesscrappin.blogspot.com/
Suzanne www.cricutcraftingrammy.blogspot.com/
Jearise http://lorbysworld.blogspot.com/


To be eligible for the grand prize, you must visit each blog and leave a comment. You also MUST visit Lisa's blog and leave a comment on Lisa's blog for the day and also become a follower at "Scrapping With Lisa" and her facebook page: http://www.facebook.com/pages/Scrapping-with-Lisa/130882060268842 . Please let her know if you don't do facebook and she won't count that against you for the blog candy. Now for the blog candy, Lisa has a great grab bag full of goodies.

Thanks for coming to day 2 of our Hop!!  Today's post is more die cuts to use for scrapbooking, cards, to decorate treat bags, etc.   Some of my pictures didn't save on my camera like I thought so I only have a couple of pictures. Not my usual pictures that I try to have step by step.  Sorry!!
Today I used the Happy Haunting cricut cartridge ( Have I told you how much I LOVE it?), I used black cardstock, purple cardstock, orange, and green cardstock, red stickles, adhesive and large pop dots (the kind the really pop up a project).

I cut the Headless Horseman, and the pumpkin @ 5".  First I cut the purple layer, then the black for the Horseman.  Then I cut the green layer, then the orange layers for the pumpkin.


Then I layered the black on top of the purple.  I layered the orange pumpkin on the green and added red stickles on the horse for his eye, then on the eyes of the pumpkin.  I then attached the pumpkin to the horseman's hand with a large pop dot.

I know you can't see it very well, but the pumpkin looked great with the red eyes!  I can't wait to use it on a scrapbook page.. I love the story of Ichabod Crane!! Soo Spooky!  Happy Halloween everyone!!

                                                             Now on to your next stop!

Have a great day and please stop back tomorrow for another great project!

Friday, October 7, 2011

What I love About Halloween/Fall Blog Hop Day 1

What I love about Halloween & Fall! Blog Hop I'm in!

Welcome to the What I Love About Fall/Halloween Blog Hop. This hop is scheduled from Oct. 7 at 8:00 am through Oct.8 at 11:00 pm(central time).

If you just happened to come to this blog, you can start at the beginning with Lisa Peters http://handmadewithlove-lisa.blogspot.com .   If you just came from Sherry's blog: http://www.upordowntheyrebeautiful.blogspot.com/ , then you are in the right spot!

We're so e...xcited to be doing this hop and we have a fabulous lineup with some very talented ladies. There will be lots of fun projects, along with some great blog candy, and a great grand prize for this hop.

The hop is a 2 day hop so you will have plenty of time to make it through the whole hop lineup twice. Check out each blog and see what blog candy you can win at the individual stops. Please come back both days to see great projects.

Here is the complete lineup:


Lisa- http://handmadewithlove-lisa.blogspot.com/
Lisa Pontious ~ http://honeybearzdesigns2011.blogspot.com/
Kristy ~ http://scraptasticalkreations.blogspot.com
April http://curlsandgrins.blogspot.com
Jamie - http://myamusinglife.blogspot.com
Anita-- http://www.anitaandbugs.blogspot.com
Sher B http://www.patternsbysher.blogspot.com
Amy http://www.lovetocrop.com
Gina http://californiascrappin-gcinderella21.blogspot.com/
Dena http://missdjones.blogspot.com/
Melinda http://thepaperthumb.blogspot.com
Shannon http://www.purplelionpaper.com/blog
Janet http://createatdreamscrapbooks.blogspot.com/
Tammy http://tampatha.wordpress.com
Barbara http://barbarab3.blogspot.com/

Sherry ~ http://www.upordowntheyrebeautiful.blogspot.com/
Christina http://cema1cema.blogspot.com
Kari http://purplefuntastickcreations.blogspot.com/
Theresa: http://www.thescrapbookingqueen.com
Vicki http://mawmawsthoughts.blogspot.com/
Mandie http://mandiesscrappin.blogspot.com/
Suzanne http://cricutcraftingrammy.blogspot.com/
Jearise http://lorbysworld.blogspot.com/

                                                                                                  
To be eligible for the grand prize, you must visit each blog and leave a comment. You also MUST visit Lisa's blog and leave a comment on Lisa's blog for the day and also become a follower at "Scrapping With Lisa" and her facebook page:  http://www.facebook.com/pages/Scrapping-with-Lisa/130882060268842 .   Please let her know if you don't do facebook and she won't count that against you for the blog candy. Now for the blog candy, Lisa has a great grab bag full of goodies.

Here is my project for today:  Sorry for some of the blurry pics,  I used my camera on my phone.  Next time I'll use my camera...


I was in a die cut swap and Here was the first project I did.  Supplies:  Mini Monsters cartridge, printed paper, black cardstock, google eyes, red stickles and adhesive.   The spider on the mini monster cartridge has a face on it.  I didn't want my cricut to cut out the face so I used a feature on my gypsy to hide the face before cutting the spider.


The spider was cut at 4" with the printed paper first, then with the black cardstock. 
Next I cut the legs off of the printed paper, and stuck the printed oval onto the black spider cut out.
Last I decorated the spiders with googly eyes and a red stickled mouth.  I think they turned out pretty cute! Thanks for stopping by my blog!


 Now on to your next stop!
Have a great day and please stop back tomorrow for another great project!